How to Scan Fast Nessus Pro Hardware
Introduction to Nessus and Hands on Practice to Scan the Network 🌐
So let's have a wait at Nessus which are developed past the Tenable network Security. Information technology is one of the nearly popular and capable known vulnerability scanner. Nessus Professional is a commercial product and a free Nessus Dwelling house version is also available. However, it's limited and but licensed for home network use.
Some of the abilities and functions of Nessus is stated in the Effigy below:

🔥 Nessus allow scans for many types of vulnerabilities. This include the vulnerabilities that permit a remote hacker to control or access sensitive information on the system. In addition, Misconfigurations similar open mail relay, missing patches, utilize default passwords, common and blank passwords on some system accounts.
🔥 Nessus is able to telephone call Hydra which is an external tool to launch a lexicon assail on the organization. Besides that, attack like denials of service against the TCP/IP stack by using malformed packets.
🔥 In a typical operation, Nessus begins by performing a port scan to determine which ports are open on that target then tries various exploits on the open ports.
🔥 The vulnerability tests available as subscriptions are written in NASL (Nessus attacks scripting language). A scripting language that are optimized for custom network interaction.
🔥 Nessus is also constantly updated with more than 70000 plugins. Primal features include remote and local authorized security checks. A customer/server architecture with a web based interface and an embedded scripting linguistic communication for writing your ain plugins or understanding an existing one.
🔥 The results of Nessus report tin can be reported in various formats such as plain text, XML and HTML etc.
🌐 For more details: https://www.tenable.com
Installing and Downloading Nessus in Kali Linux Os:
⭐️ Nessus is not embedded in the Kali Linux operating system. So let'south first download it and install information technology with the post-obit steps:

Search for "Nessus habitation download" in the search engine (no matter what you are using, perhaps yous tin effort out duckduckgo 🐤). The Nessus habitation version is the name for the costless version of Nessus which I mentioned before.

We need an activation lawmaking in order to use Nessus home and we have to register for an activation code. Thus, you improve annals with your exact name and e-mail address.

In this page, we can notice a download link for Nessus dwelling house after clicking on the Download button.

In the electronic mail address that nosotros registered, nosotros will found a activation lawmaking for Nessus. Then, click on the button to proceed to the download link.

Here is the list of the binaries of Nessus Domicile. My motorcar (Kali Linux OS) is a 64-flake Debian and I'm going to click on it and download.

Retrieve to save the file for this automobile.

Locate the Nessus file that nosotros but downloaded.

Then, switch to user and install the packet. Use the "dpkg" Linux command with -i parameter and the file proper name. By the way, remember that you tin use the tab central to complete the file name and hit enter.
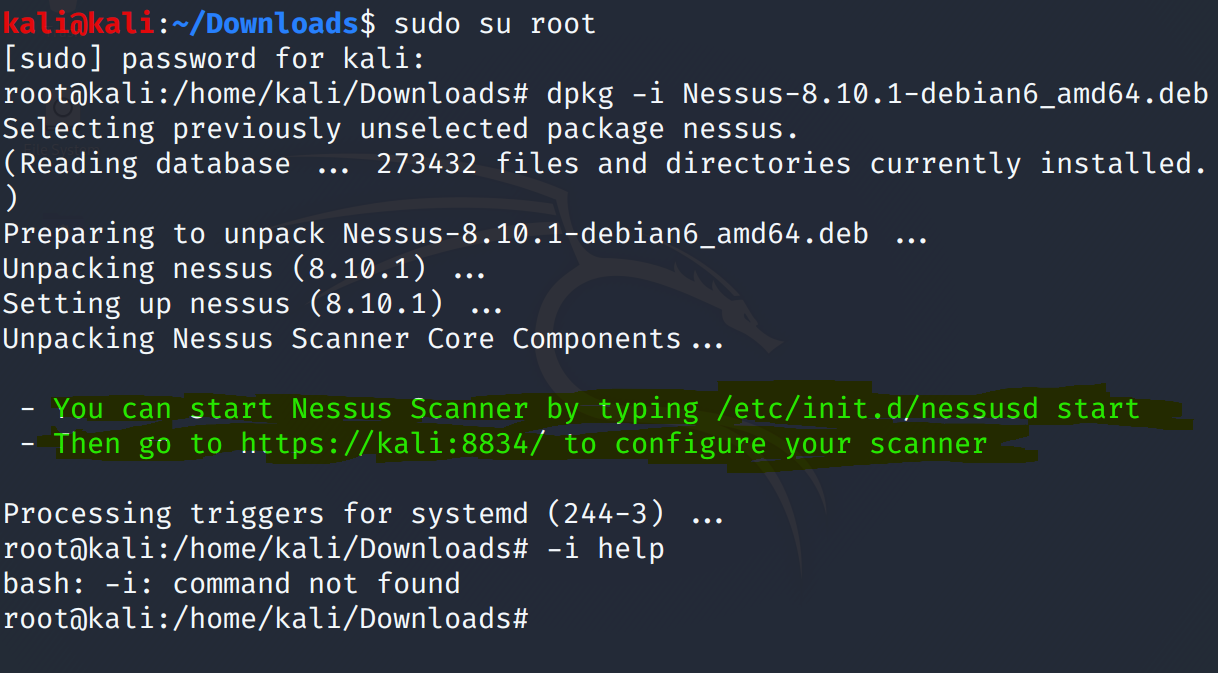
Now, let's look at the message. It says that we should start the nessusd to offset Nessus Home and then we can connect to the spider web interface of Nessus which will be served at port 8834 which is the default port of Nessus Abode's Interface.

Utilise the service command to check for the status of nessusd daemon and it is inactive at the moment.

Type "service nessusd start" to commencement the nessusd daemon. And so, nosotros will look into the port of our Kali Auto which happened to exist in listen manner with "netstat" command with -tnlp parameters.
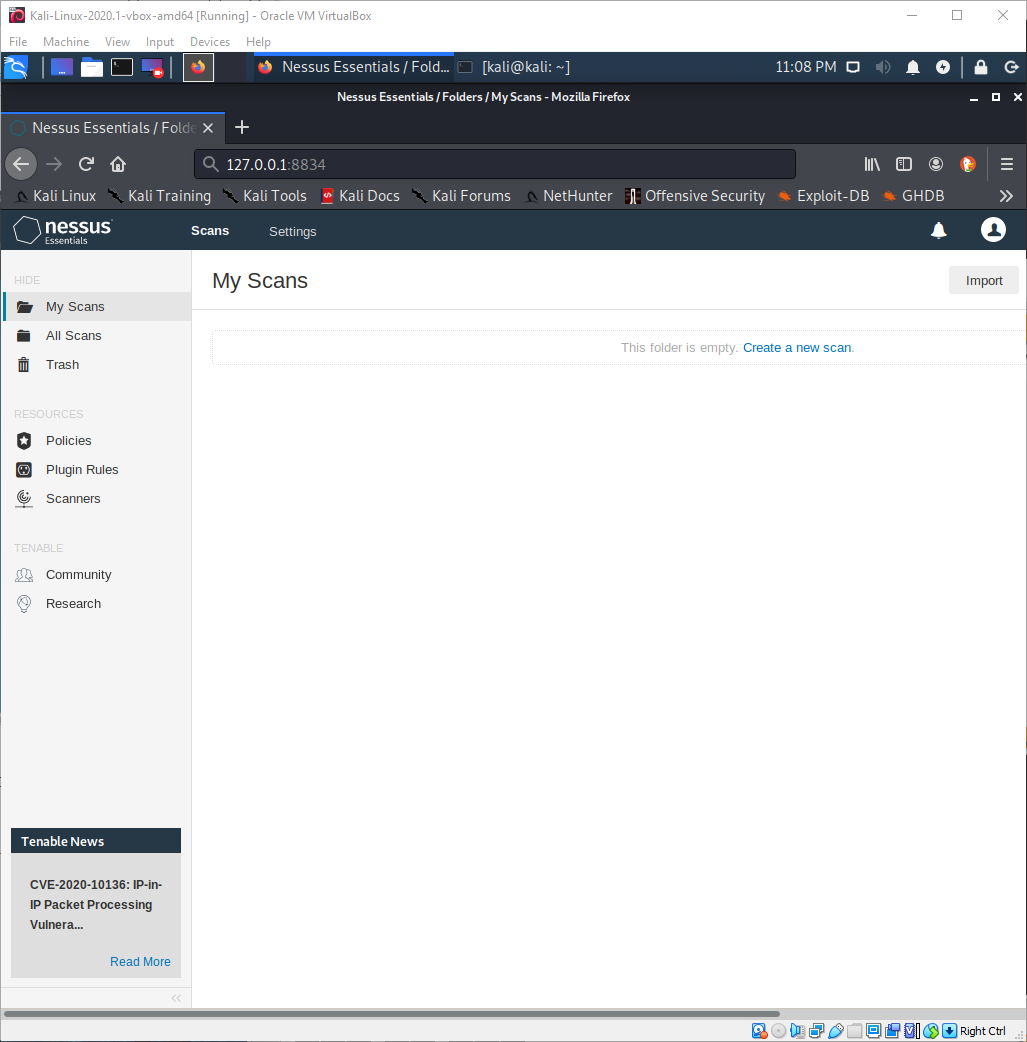
Now, we can access Nessus Home's spider web interface:

The IP accost "127.0.0.one" stands for the local host and ":8834" which is the default port for nessusd.

(Annotation: You may also use the IP address of your Kali Machine as it will still work. Hither, we have a bad asking in the browser.)

The Nessus is a HTTPS service so we demand to apply the HTTPS at the beginning of the browser's URL. Then, we can see that the connection posses a alert message with Potential Security Risk Ahead. This is because the local certificate of Nessus is not registered by a CA(certificate authority). No worries! Nosotros tin can simply click Advanced>Accept Chance and Go along to continue.

Here is the first interaction with Nessus Home'due south web interface.

Here is the Nessus production type installation and we select the Nessus Essentials which is the complimentary version.

Then, we are able to annals the email address to get the activation code if you haven't do so. Yet if yous already registered, then skip this process.

Enter the required activation code from the email address.

Then, create a new user account for the Nessus scanner.

Outset, it will download the plugins and the speed vary according to the connexion speed. Then, it will offset the procedure of compiling the plugins. Information technology may have a few minutes, be patient and go take hold of yourself some snack 🍟 and java ☕️.
After we finish downloading the plugins, we enter the username and countersign to log into Nessus business relationship.
Training for Scanning with our own custom policy :

In the Nessus web interface, click Policies in the left panel and so click on create a new policy.

In the Policy templates, there are a lot scanner. As for the "Advance Browse" all the options are called by us without any guidance or recommendation. Yous can navigate through the listing of scanner and encounter its details.
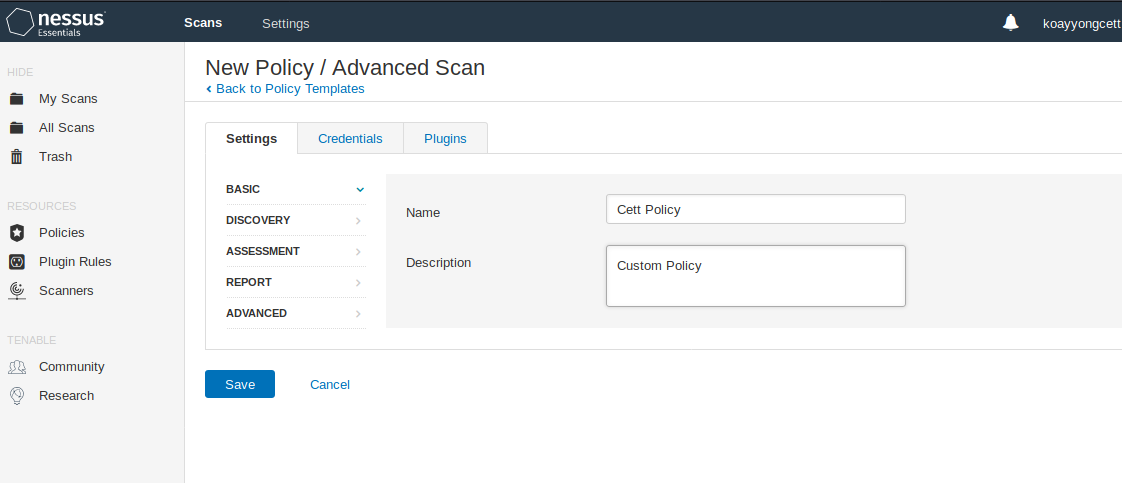
Allow's configure our own scan by clicking on the "Avant-garde Scan". First, nosotros provide the name and description of the policy.

Now, we are at the Discovery Section. In the figure above, we are in the Host Discovery page.

If we have the data that nosotros nerveless from Nmap (for my case), then nosotros can close this ping browse because we already take the listing of hosts.

Then, Click the Port Scanning to configure the port scanning options. The port browse ranges is set as default. This means that Nessus will browse the ports present in its nessus-service file.

Now, nosotros will locate or find the nessus-service file and analyze it. Since we tin can't locate it, then we will find the file first with the find command. The "/" means that the search will initiate from the root directory. As for the "-name" shows the proper name of the search file. In the figure to a higher place, the file with name nessus-services is institute.

The less control is use to come across the content of the file.

Here, we can run across that at that place are ports, protocols and the default services which use these ports is illustrated. Enter Q to quit.

Now, I desire to see the number of the lines of nessus-services file to understand how many ports that are actually scanned by default. Use cat control with file name, and then add a pipage and "wc" for word count.
- 9013 = number of lines
- 18026 = number of words
- 168729 = number of charcters
Therefore, we tin conclude that 9,013 ports are scanned past default which is the total ports for both the TCP and UDP ports.
What if you want to run into the number of TCP ports scanned in the file by default? How?

We tin use the grep command before the "wc" parameter. With this command, you can run into the number of TCP port scanned past default.

If nosotros want to scan all ports, nosotros demand to specified it by typing in "i–65535" in the port browse range field.

Still, if y'all have some credentials that you want to browse some services in depth. Y'all tin can ascertain those credentials before the browse in the credentials tab.

Let'southward continue back to Port Scanning, there are many options for the local port enumerators under the Port Scanning pick.

However in the Port Scanning, nosotros have the Network Port Scanners type option. The SYN scan is selected by default. If you prefer other, you can select the TCP and UDP scan besides according to the preferences.

Under the service discovery, at that place are options to probe all ports to find services and Search for the SSL/TLS services. All of this options volition be leave as default.

In that location are also a lot of cess that you can specified according to the preferences. In this demonstration, I will merely exit all this options as default.

Under the report session, in that location are processing and output option that allow you lot to specify the information illustrated in the report. All of this, I will leave equally default in current demonstration.
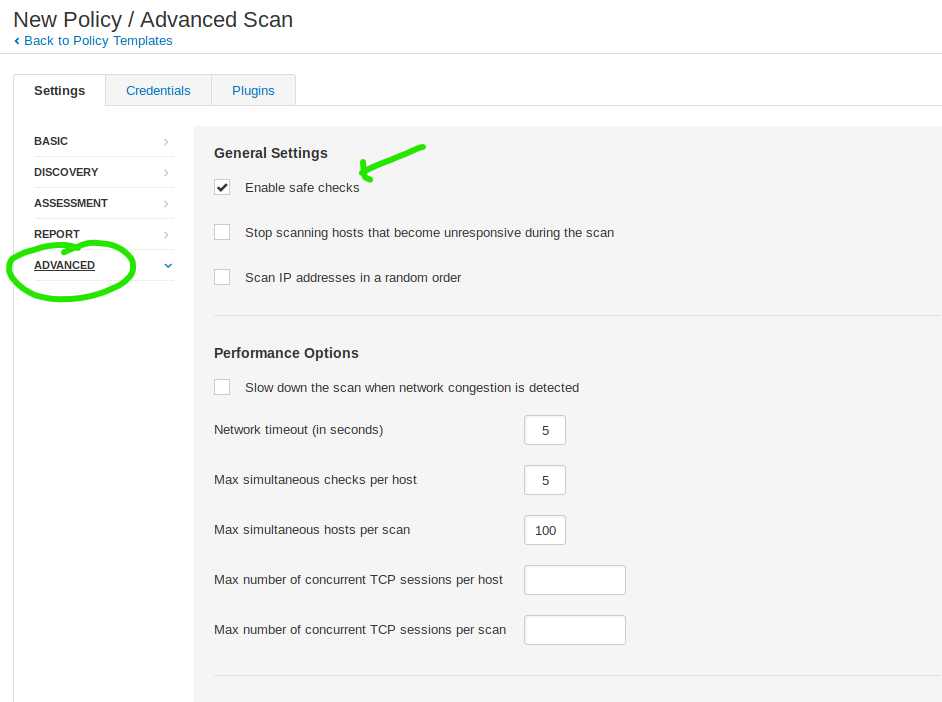
In the advanced department, rubber checks are enabled by default.
Several scans available in Nessus have the potential to perform deportment that may try intrusive tactics in order to detect and test a vulnerability's existence. These include the Shadow Brokers scan, the Spectre and Meltdown Scan, the WannaCry Ransomware browse, and various options in the Advanced Scan. To avoid damage to the target, the safe checks feature runs sure plugins in a non-intrusive mode.

The "Scan IP addresses in a random order" is selected to brand the scan petty more than stealthy.

Here, this is the performance options for the browse.

In this demonstration, the number of Max simultaneous hosts per scan is reduced to 20 instead of 100. This is done to avoid delays and network traffic.

In addition, we are able to define the max number of concurrent TCP sessions per host which are non defined past default. The upper bound is defined to keep the hosts prophylactic.

And once more we may also define the maximum number of concurrent TCP sessions per browse to keep the network traffic safe.

In the Plugins tab, we have tons of plugin used in Nessus scans.

If you click on one of the plugins families, you will see all the plugin in the family unit at the right section. The number of the full plugins existed in the families is also shown in the effigy higher up.
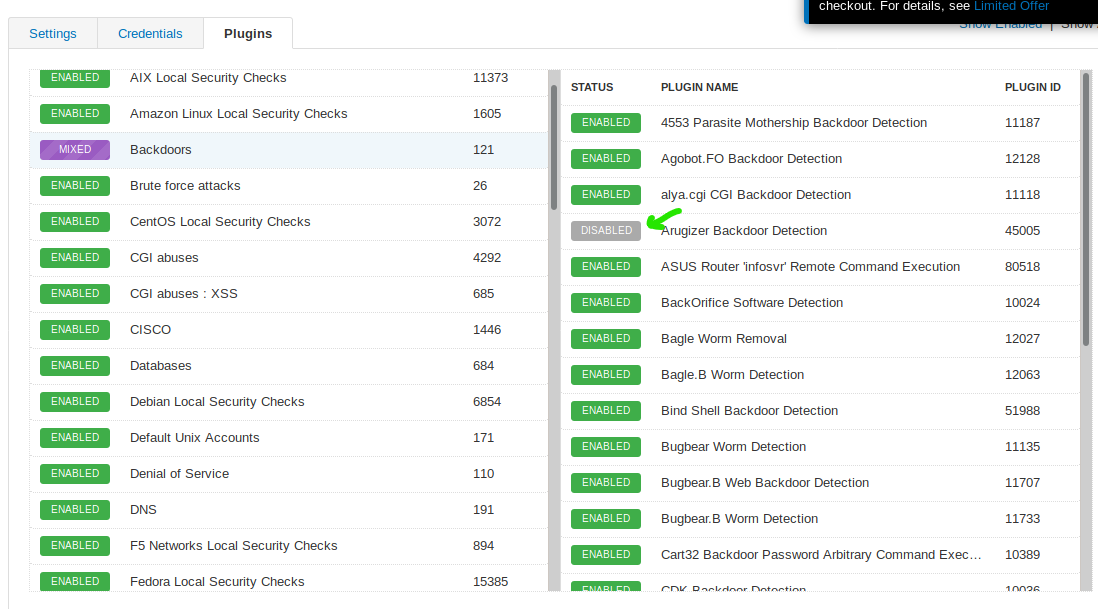
Nosotros tin can click on the "enabled" green button to disable it.

You may also disabled the unabridged family unit by clicking on the "enabled" button at tle left paw section which is the plugin families department.
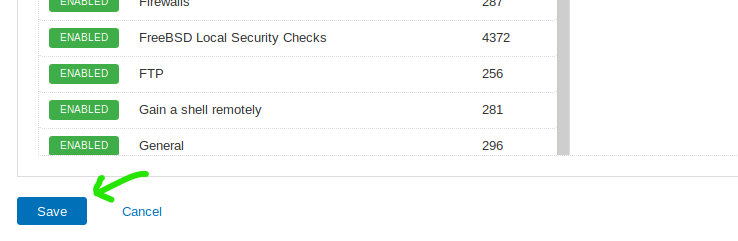
Click save and the policy is saved.

Now, we have our own scan policy.
Now, we are ready to perform a scan:

In my scan sections. click on the "new scan" or "create new scan" to beginning scanning.

Starting time Nessus ask for the scanner. Unfortunately, some scans are disabled for the free version of Nessus. However, at that place are ton of bones scanner available for united states like basic network scan.

Alternatively, we can navigate to the User Defined Tab and select our own policy. This is the policy that we divers in the preparation department that we mentioned before.

Click on the "Cett Policy" to proceed to this page. Now, all the field is added according to suit your preferences. In addition, the targets is also defined and specified with the IP address added. In this demonstration, I will browse my metasploitable machine (ten.0.2.4) and window car (ten.0.2.five).
👉 Note: If you desire to put multiple IP addresses in a line then just put a comma in between them. In improver, y'all may also define an IP Block or range.

Alternatively, if you accept a file that contains a list of hosts, you can use the "Add File" link under the Upload Targets sections.

At present, we are fix to launch the scan that are located at the lesser of the page. We are able to save or launch the scan immediately. Side by side, I choose launch to start now.

The scanning process started.

If i click on the scan that started, information technology volition be directed into the page shown in the figure. At that place are 3 tabs in this page which is "Host", "Vulnerabilities" and "History".

When we click on the "Vulnerabilities" Tab, nosotros observe the data related to the vulnerabilities constitute during the scan.

in the right hand side, we can see the severity levels of the vulnerabilities.
Nessus classified the vulnerabilities into 5 levels:
- Info: Identifies the not-vulnerability data and separates it from the vulnerability item.
- Low: Identifies the flaws that might help an attacker to ameliorate refine his set on. Even so past itself this flaw won't be sufficient to compromise that arrangement.
- Medium: Identifies some information that is leaking from the remote host. An attacker might be able to read a file that he/she would non take the access to do and so.
- Loftier: identifies that the attacker can read arbitrary files on the remote host and or can execute commands on the remote host.
- Disquisitional: It is the virtually important vulnerabilities which can be exploited by a tool and in most cases the aggressor doesn't demand to make an actress effort to exploit them.

Finally, the browse is completed in 8 minutes for both system and it is quite fast.

Here is all the vulnerabilities found in the metasploitable car and information technology is ordered by severity levels by default.

Click on the vulnerability to see the details of it. We have the proper name of vulnerability, clarification, solution method and links to learn about it more than.

This is the port and host where the vulnerability establish.

In the right hand side, Nessus explicate that we are able to exploit it using core impact which is a commercial and very powerful exploitation tool. 10.0 is the perfect for the score in Nessus.
Let'due south see some other critical vulnerabilities:

In this vulnerabilities, the VNC server is running on the host and information technology's password is "password". if that's true and in that location is no additional mensurate to protect the host. We can admission that host very hands.
Now, let'south test it:

We tin run the VNC viewer by typing "xvncviewer" in the terminal and hitting enter.
Annotation: If you lot don't have vnc viewer installed, then blazon "apt-get install xvncviewer" and hit enter to install.

Type the IP address of Metasploitable automobile in the VNC server and hitting enter.

now, type the "password" into the password field and hit enter over again.

Yay! We are in the organisation 😈

- Use the "whoami" to larn the user that I have caught.
- "uname -a" to learn the operating system and the kernel details.
- "ifconfig" to see the information almost the network interfaces etc.

- Use "ls -al" command to see all the files in metasploitable machine.
0 Response to "How to Scan Fast Nessus Pro Hardware"
Post a Comment